Using GoAccess with Nginx to replace Google Analytics
post, Jan 25, 2021, on Mitja Felicijan's blog
Introduction
I know! You cannot simply replace Google Analytics with parsing access logs and
displaying a couple of charts. But to be honest, I actually never used Google
Analytics to the fullest extent and was usually interested in seeing page hits
and which pages were visited most often.
I recently moved my blog from Firebase to a VPS and also decided to remove
Google Analytics tracking code from the site since its quite malicious and
tracks users across other pages also and is creating a profile of a user, and
I've had it. But I also need some insight of what is happening on a server and
which content is being read the most etc.
I have looked at many existing solutions like:
But the more I looked at them the more I noticed that I am replacing one evil
with another one. Don't get me wrong. Some of these solutions are absolutely
fantastic but would require installation of databases and something like PHP or
Node. And I was not ready to put those things on my fresh server. Also having
Docker installed is out of the question.
Opting for log parsing
So, I defaulted to parsing already existing logs and generating HTML reports
from this data.
I found this amazing software GoAccess which provides
all the functionalities I need, and it's a single binary. Written in Go.
GoAccess can be used in two different modes.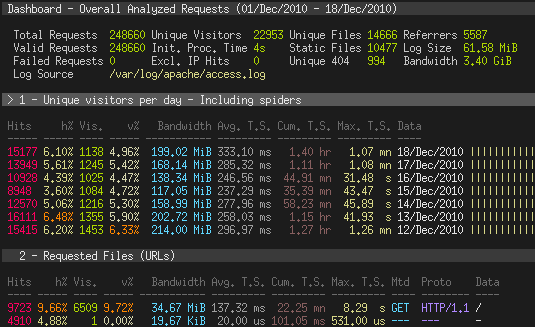
Running in a terminal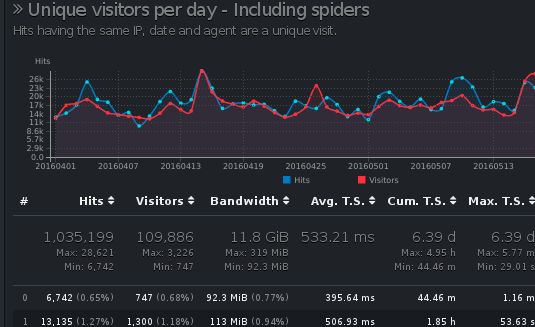
Running in a browser
I, however, need this to run in a browser. So, the second option is the way to
go. The Idea is to periodically run cronjob and export this report into a folder
that gets then server by Nginx behind a Basic authentication.
Getting Nginx ready
I choose Ubuntu on DigitalOcean. First I
installed Nginx, and
Letsencrypt certbot and all the
necessary dependencies.
# log in as root user
sudo su -

# first let's update the system
apt update && apt upgrade -y

# let's install
apt install nginx certbot python3-certbot-nginx apache2-utils
After all this is installed we can create a new configuration for a statistics.
Stats will be available at stats.domain.com.
# creates directory where html will be hosted
mkdir -p /var/www/html/stats.domain.com

cp /etc/nginx/sites-available/default /etc/nginx/sites-available/stats.domain.com
nano /etc/nginx/sites-available/stats.domain.com
server {
  root /var/www/html/stats.domain.com;
  server_name stats.domain.com;

  index index.html;
  location / {
    try_files $uri $uri/ =404;
  }
}
Now we check if the configuration is ok. We can do this with nginx -t. If all
is ok, we can restart Nginx with service nginx restart.
After all that you should add A record for this domain that points to IP of a
droplet.
Before enabling SSL you should test if DNS records have propagated with curl stats.domain.com.
Now, it's time to provision TLS certificate. To achieve this, you execute
command certbot --nginx. Follow the wizard and when you are asked about
redirection always choose 2 (always redirect to HTTPS).
When this is done you can visit https://stats.domain.com and you should get 404
not found error which is correct.
Getting GoAccess ready
If you are using Debian like system GoAccess should be available in repository.
Otherwise refer to the official website.
apt install goaccess
To enable Geo location we also need one additiona thing.
cd /var/www/html/stats.stats.com
wget https://github.com/P3TERX/GeoLite.mmdb/raw/download/GeoLite2-City.mmdb
Now we create a shell script that will be executed every 10 minutes.
nano /var/www/html/stats.domain.com/generate-stats.sh
Contents of this file should look like this.
#!/bin/sh

zcat -f /var/log/nginx/access.log* > /var/log/nginx/access-all.log

goaccess \
  --log-file=/var/log/nginx/access-all.log \
  --log-format=COMBINED \
  --exclude-ip=0.0.0.0 \
  --geoip-database=/var/www/html/stats.domain.com/GeoLite2-City.mmdb \
  --ignore-crawlers \
  --real-os \
  --output=/var/www/html/stats.domain.com/index.html

rm /var/log/nginx/access-all.log
Because after a while nginx creates multiple files with access logs we use
zcat to extract Gziped contents and create
a file that has all the access logs. After this file is used we delete it.
If you want to exclude your home IP's result look at the --exclude-ip option
in script and instead of 0.0.0.0 add your own home IP address. You can find
your home IP by executing curl ifconfig.me from your local machine and NOT
from the droplet.
Test the script by executing sh /var/www/html/stats.domain.com/generate-stats.sh and then checking
https://stats.domain.com. If you can see stats instead of 404 than you are
set.
It's time to add this script to cron with cron -e.
*/10 * * * * sh /var/www/html/stats.domain.com/generate-stats.sh
Securing with Basic authentication
You probably don't want stats to be publicly available, so we should create a
user and a password for Basic authentication.
First we create a password for a user stats with htpasswd -c /etc/nginx/.htpasswd stats.
Now we update config file with nano /etc/nginx/sites-available/stats.domain.com. You probably noticed that the
file looks a bit different from before. This is because certbot added
additional rules for SSL.
Your location portion the config file should now look like. You should add
auth_basic and auth_basic_user_file lines to the file.
location / {
  try_files $uri $uri/ =404;
  auth_basic "Private Property";
  auth_basic_user_file /etc/nginx/.htpasswd;
}
Test if config is still ok with nginx -t and if it is you can restart Nginx
with service nginx restart.
If you now visit https://stats.domain.com you should be prompted for username
and password. If not, try reopening your browser.
That is all. You now have analytics for your server that gets refreshed every 10
minutes.