Getting started with MicroPython and ESP8266
post, Sep 6, 2020, on Mitja Felicijan's blog
Introduction
A while ago I bought some
ESP8266 and
ESP32 dev boards to play
around with and I finally found a project to try it out.
For my project, I used ESP32
but I could easily choose
ESP8266. This guide
contains which tools I use and how I prepared my workspace to code for
ESP8266.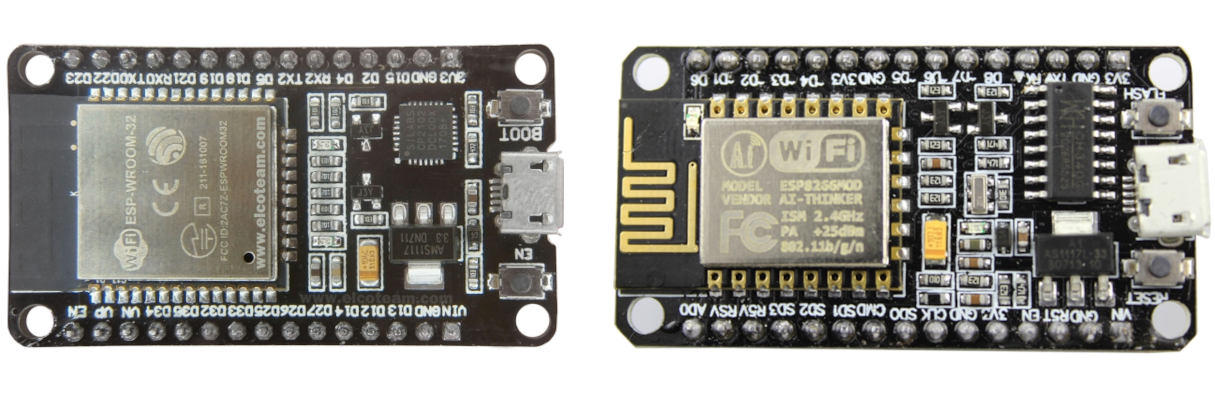
This guide covers:
- flashing SOC
- install proper tooling
- deploying a simple script
Make sure that you are using a good USB cable. I had some problems with
mine and once I replaced it everything started to work.
Flashing the SOC
Plug your ESP8266 to USB port and check if the device was recognized with
executing dmesg | grep ch341-uart.
Then check if the device is available under /dev/ by running ls /dev/ttyUSB*.
Linux users: if a device is not available be sure you are in dialout
group. You can check this by executing groups $USER. You can add a user to
dialout group with sudo adduser $USER dialout.
After these conditions are meet go to the navigate to
https://micropython.org/download/esp8266/
and download esp8266-20200902-v1.13.bin.
mkdir esp8266-test
cd esp8266-test

wget https://micropython.org/resources/firmware/esp8266-20200902-v1.13.bin
After obtaining firmware we will need some tooling to flash the firmware to the
board.
sudo pip3 install esptool
You can read more about esptool at
https://github.com/espressif/esptool/.
Before flashing the firmware we need to erase the flash on device. Substitute
USB0 with the device listed in output of ls /dev/ttyUSB*.
esptool.py --port /dev/ttyUSB0 erase_flash
If flash was successfully erased it is now time to flash the new firmware to it.
esptool.py --port /dev/ttyUSB0 --baud 460800 write_flash --flash_size=detect 0 esp8266-20200902-v1.13.bin
If everything went ok you can try accessing MicroPython REPL with screen /dev/ttyUSB0 115200 or picocom /dev/ttyUSB0 -b115200.
Sometimes you will need to press ENTER in screen or picocom to access
REPL.
When you are in REPL you can test if all is working properly following steps.
> import machine
> machine.freq()
This should output a number representing a frequency of the CPU (mine was
80000000).
When you are in screen or picocom these can help you a bit.
| Key | Command |
|---|
| CTRL+d | preforms soft reboot |
| CTRL+a x | exits picocom |
| CTRL+a \ | exits screen |
Now, to make our lives a little bit easier there are couple of additional tools
that will make this whole experience a little more bearable.
There are twq cool ways of uploading local files to SOC flash.
ampy
# installing ampy
sudo pip3 install adafruit-ampy
Listed below are some common commands I used.
# uploads file to flash
ampy --delay 2 --port /dev/ttyUSB0 put boot.py

# lists file on flash
ampy --delay 2 --port /dev/ttyUSB0 ls

# outputs contents of file on flash
ampy --delay 2 --port /dev/ttyUSB0 cat boot.py
I added delay of 2 seconds because I had problems with executing commands.
rshell
Even though ampy is a cool tool I opted with rshell in the end since it's
much more polished and feature rich.
# installing ampy
sudo pip3 install rshell
Now that rshell is installed we can connect to the board.
rshell --buffer-size=30 -p /dev/ttyUSB0 -a
This will open a shell inside bash and from here you can execute multiple
commands. You can check what is supported with help once you are inside of a
shell.
m@turing ~/Junk/esp8266-test
$ rshell --buffer-size=30 -p /dev/ttyUSB0 -a

Using buffer-size of 30
Connecting to /dev/ttyUSB0 (buffer-size 30)...
Trying to connect to REPL  connected
Testing if ubinascii.unhexlify exists ... Y
Retrieving root directories ... /boot.py/
Setting time ... Sep 06, 2020 23:54:28
Evaluating board_name ... pyboard
Retrieving time epoch ... Jan 01, 2000
Welcome to rshell. Use Control-D (or the exit command) to exit rshell.
/home/m/Junk/esp8266-test> help

Documented commands (type help <topic>):
========================================
args    cat  connect  date  edit  filesize  help  mkdir  rm     shell
boards  cd   cp       echo  exit  filetype  ls    repl   rsync

Use Control-D (or the exit command) to exit rshell.
Inside a shell ls will display list of files on your machine. To get list
of files on flash folder /pyboard is remapped inside the shell. To list files
on flash you must perform ls /pyboard.
Moving files to flash
To avoid copying files all the time I used rsync function from the inside of
rshell.
rsync . /pyboard
Executing scripts
It is a pain to continuously reboot the device to trigger /pyboard/boot.py and
there is a better way of testing local scripts on remote device.
Lets assume we have src/freq.py file that displays CPU frequency of a remote
device.
# src/freq.py

import machine
print(machine.freq())
Now lets upload this and execute it.
# syncs files to remove device
rsync ./src /pyboard

# goes into REPL
repl

# we import file by importing it without .py extension and this will run the script
> import freq

# CTRL+x will exit REPL
Additional resources